Steel Cantilever Rack Plans


Free Steel Cantilever Storage Rack Plans

This cantilever rack is the perfect solution to store your lengths of steel, timber or any other long lengths of material that you may have cluttering up your shed or workshop.

WARNING: DO NOT attempt to build this project if you are not a skilled welder as failure of welds or materials can result in injury to people or damage to property.

The steel shown in the cutting list is only a guide as you may have other material already available that you can use.

Materials Required
Item Number Material Length Quantity
1 125x75x4 RHS 2700mm 4
2 125x75x4 RHS 1100mm 4
3 75x5 flat bar 125mm 12
4 50x50x4 SHS 700mm 20
5 50x5 flat bar 50mm 20
6 50x50x5 angle 1920mm 6
7 15NB pipe 50mm 50
8 15NB pipe 20mm 20
9 14mm round bar 150mm 20
10 100x6 flat bar 175mm 8
11 75x10mm flat 140mm 2
  Lower 3 point linkage pins To suit your tractor 2
Upper 3 point linkage pin To suit your tractor 1
steel storage rack plans

Diagram 1

1. Begin by cutting all of the steel as indicated in the cutting list. Label each with the item number on it using a marking pen and set aside.

2. Weld 1 of item 3 onto one end of item 1.

3. Weld 1 of item 3 onto both ends of item 2.

4. Tack weld Items 1 and 2 together as shown in Diagram 1. Ensure that the frames are square and fully weld. Four of these frames are required.

5. Weld 1 of item 5 (50x5 flat bar) to one end of item 4 (50x50x4 SHS). You will need 20 of these.

6. Tack weld items 4 onto the centre of the front face of the posts (item 1) as shown in diagram 1. Check that these are square to the posts and fully weld.

steel storage rack plans

Diagram 2

7. Next weld one of each of item 8 onto item 9. Refer to diagram 2.


free steel storage rack plans

Diagram 3

8. Weld items 7 to the face of the outriggers as shown in diagram 3.

free steel storage rack plans

Diagram 4

9. Drill 17mm holes into the corners of item 10. Refer to diagram 4.

steel rack free plans

Diagram 5

10. Weld items 10 onto the rear of the posts as shown in diagram 5. The lower plate is shown in the diagram. The top plates are positioned 1600mm above the lower plates.

steel rack free plans

Diagram 6

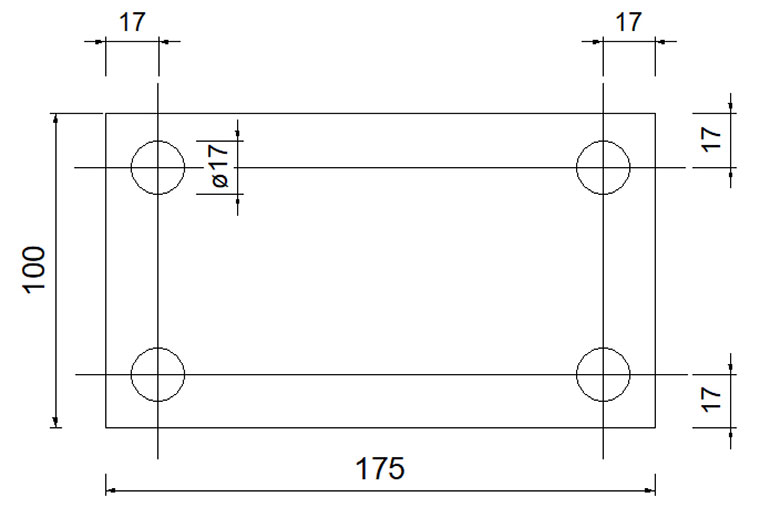
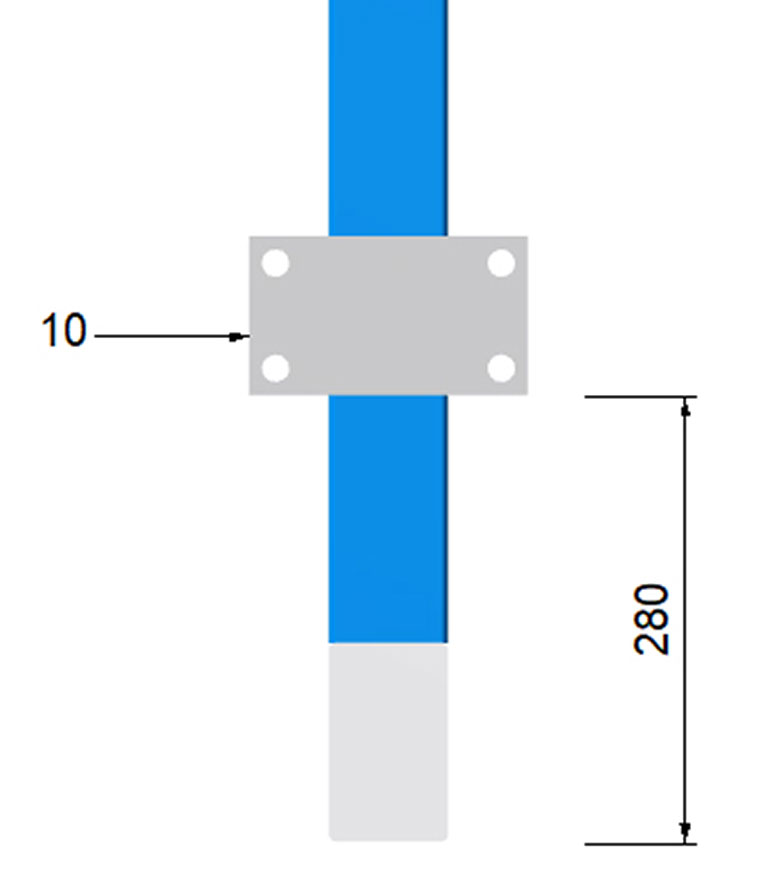
11. Drill a 17mm hole in both ends of item 6. Refer to diagram 6.

12. Clean any welds using a grinding disc or flap disc and paint as required.

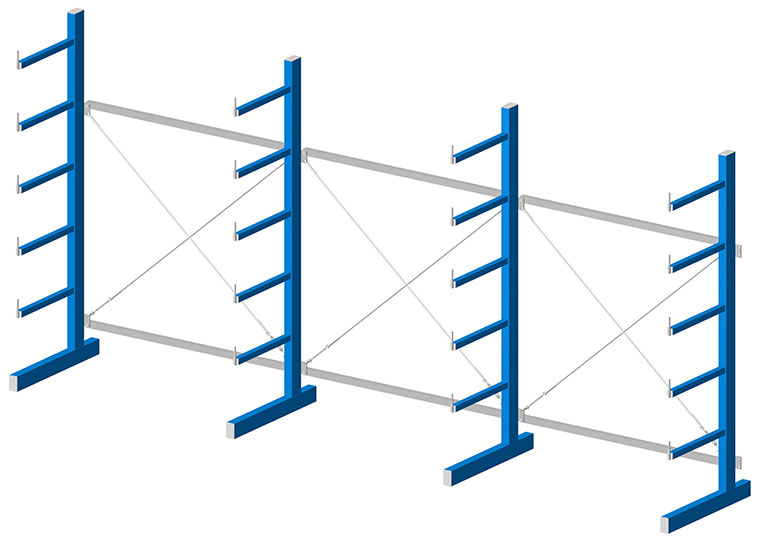
13. To assemble, you will need 2 people to help with the operation. Stand one of the post assemblies and using a bolt and nut, secure one of the angles to the lower hole in the lower plate and another angle to the top hole in the upper plate. Have another person hold the second post assembly in the appropriate position and secure the other ands of the angle using bolts and nuts. Secure the bolts and nuts tightly.

14. Cut the wire rope to the required length and attach it to the lower hole in the top plate using two wire rope clamps. A D shackle is used to secure a turnbuckle to the top hole in the lower plate of the second post assembly. Secure the loose end of the wire rope to the turnbuckle using two wire rope clamps. This needs to be repeated twice for each section so that there are two wire ropes running diagonally to each other.

15. Repeat the previous two steps for the remaining post assemblies.

User Comments

Leave a comment


© 2010 Kurraglen Industries All rights reserved